| How to build a ChatGPT Slack bot with Zapier | 您所在的位置:网站首页 › slash app › How to build a ChatGPT Slack bot with Zapier |
How to build a ChatGPT Slack bot with Zapier
|
We lean pretty heavily on Slack for our day-to-day communication at Zapier. You could even say we push the boundaries of how much work can get done in Slack during our quarterly no meeting week. Do more with OpenAIDiscover more ways to add AI to your workflows.Explore nowSomething that helps us get the most out of Slack is using Zapier to connect our favorite apps—giving us more capability inside an already powerful platform. One of my favorites I've connected recently? ChatGPT. By integrating ChatGPT and Slack, I can send prompts and get responses without leaving Slack. If I need to ask a question, brainstorm a title for a blog post, or get help formulating a response to a message, I can do it without context switching. In this blog post, we'll walk through two different ways to bring the power of ChatGPT—and GPT-4, if you're a ChatGPT Plus user—into your Slack workspace. A reply bot that sends replies with a response from ChatGPT in a thread whenever a prompt is posted in a particular channel A ChatGPT slash command bot that sends prompts and fetches responses in any channel This workflow requires a multi-step Zap, which is available on a paid Zapier plan or during a free trial. Learn more about multi-step Zaps. Create a ChatGPT reply botWith Zapier, you can create automated workflows (we call them Zaps) that send information between different apps. You can create a Zap from scratch, or use a template to get started quickly. Getting started with a template is easy. Click on the Zap template below, which will take you to the Zap editor. You'll be prompted to create a Zapier account if you don't have one already. Once that's done, just follow the instructions below to set up your Zap. Start a conversation with ChatGPT when a prompt is posted in a particular Slack channelStart a conversation with ChatGPT when a prompt is posted in a particular Slack channelTry itNew to Zapier? It's a tool that helps anyone connect apps and automate workflows—without any complicated code. Sign up for free. Before you beginMake sure you set up a free OpenAI account before getting started. Once you've opened your account, click the settings tab in the top right corner and select View API keys. 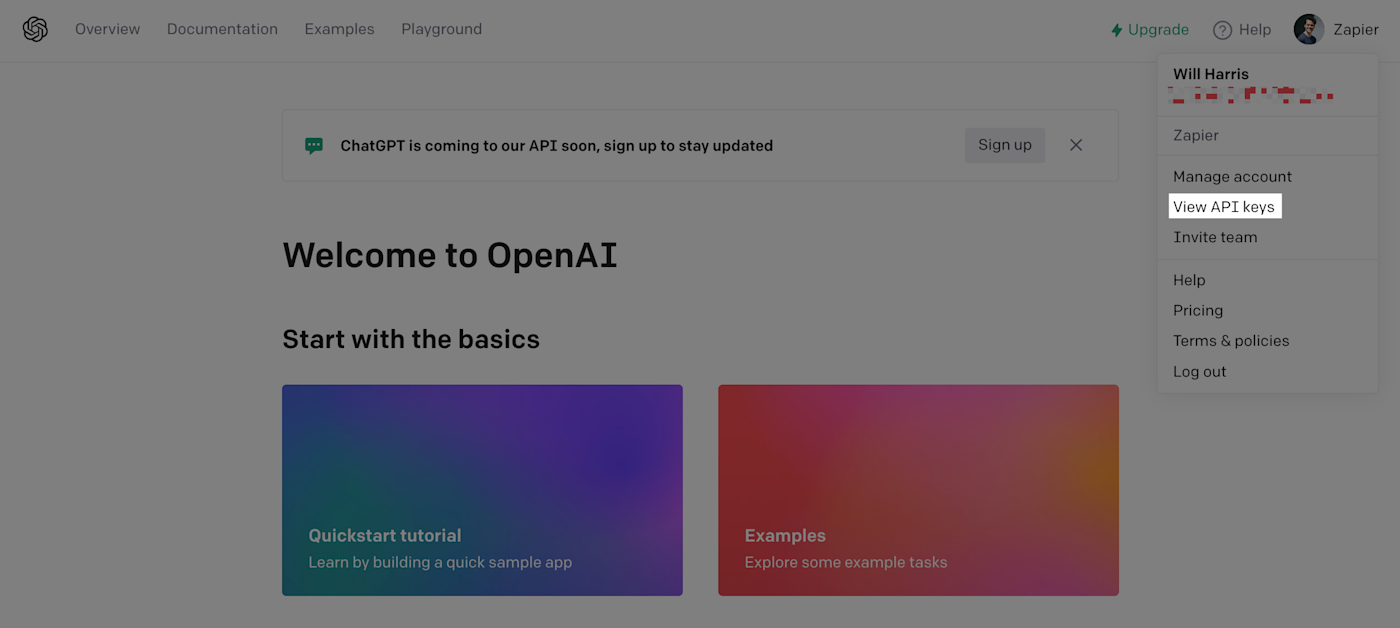 Then, click the + Create new secret key button to generate your API key. Make sure to copy the key while you're here. You'll need it later when connecting your OpenAI account to Zapier. 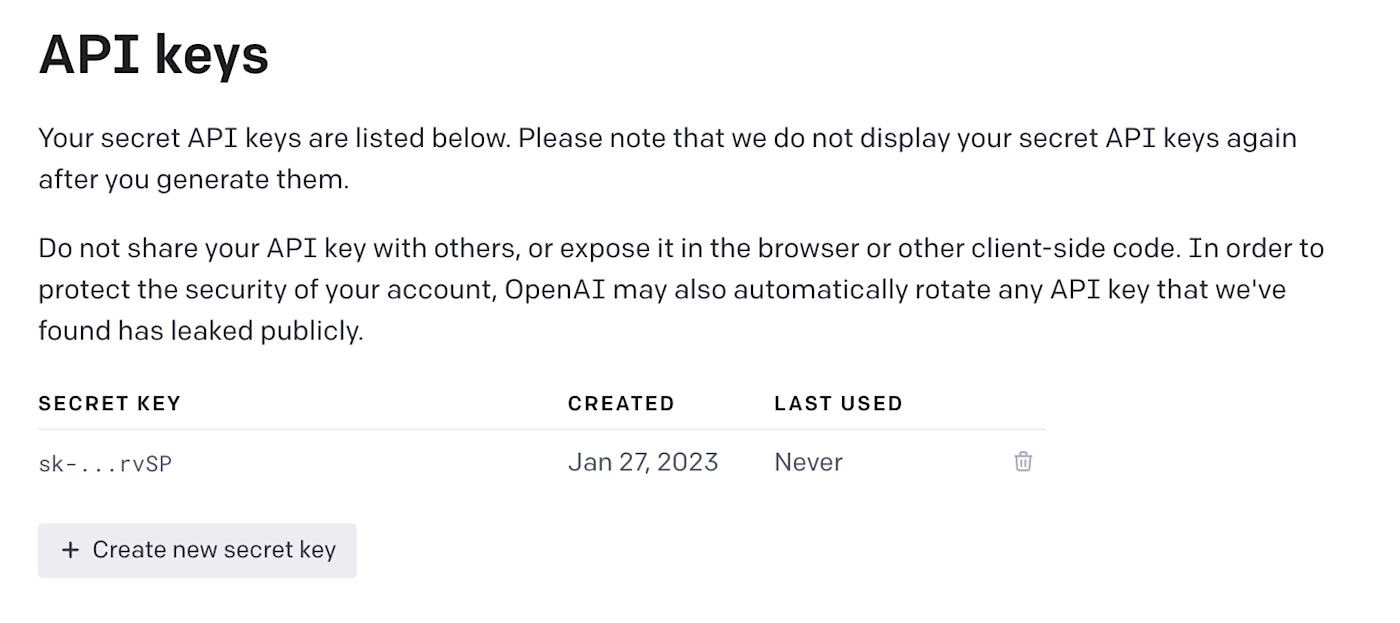 Set up your Slack trigger Set up your Slack triggerTime to set up your trigger—the event that starts your Zap. Choose Slack for your trigger app and New Message Posted to Channel as your event. If you're using the Zap template, this will already be selected for you. 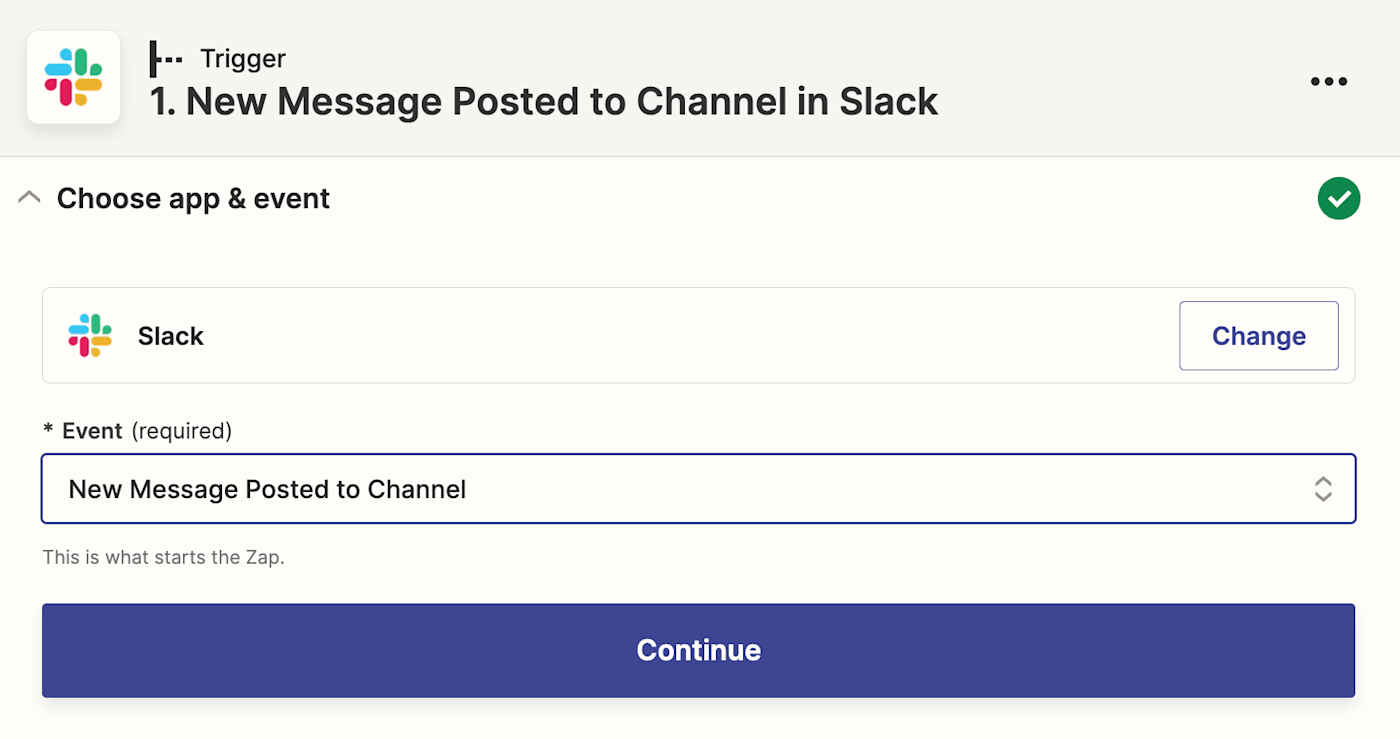 Connect your Slack account if you haven't already. Click on Choose an account… and click + Connect a new account, or select an account from the dropdown menu if you've connected Slack to Zapier before. Click Continue. Next, select the channel you want to send your ChatGPT prompts to. Click the dropdown menu to see the list of channels in your selected Slack account. 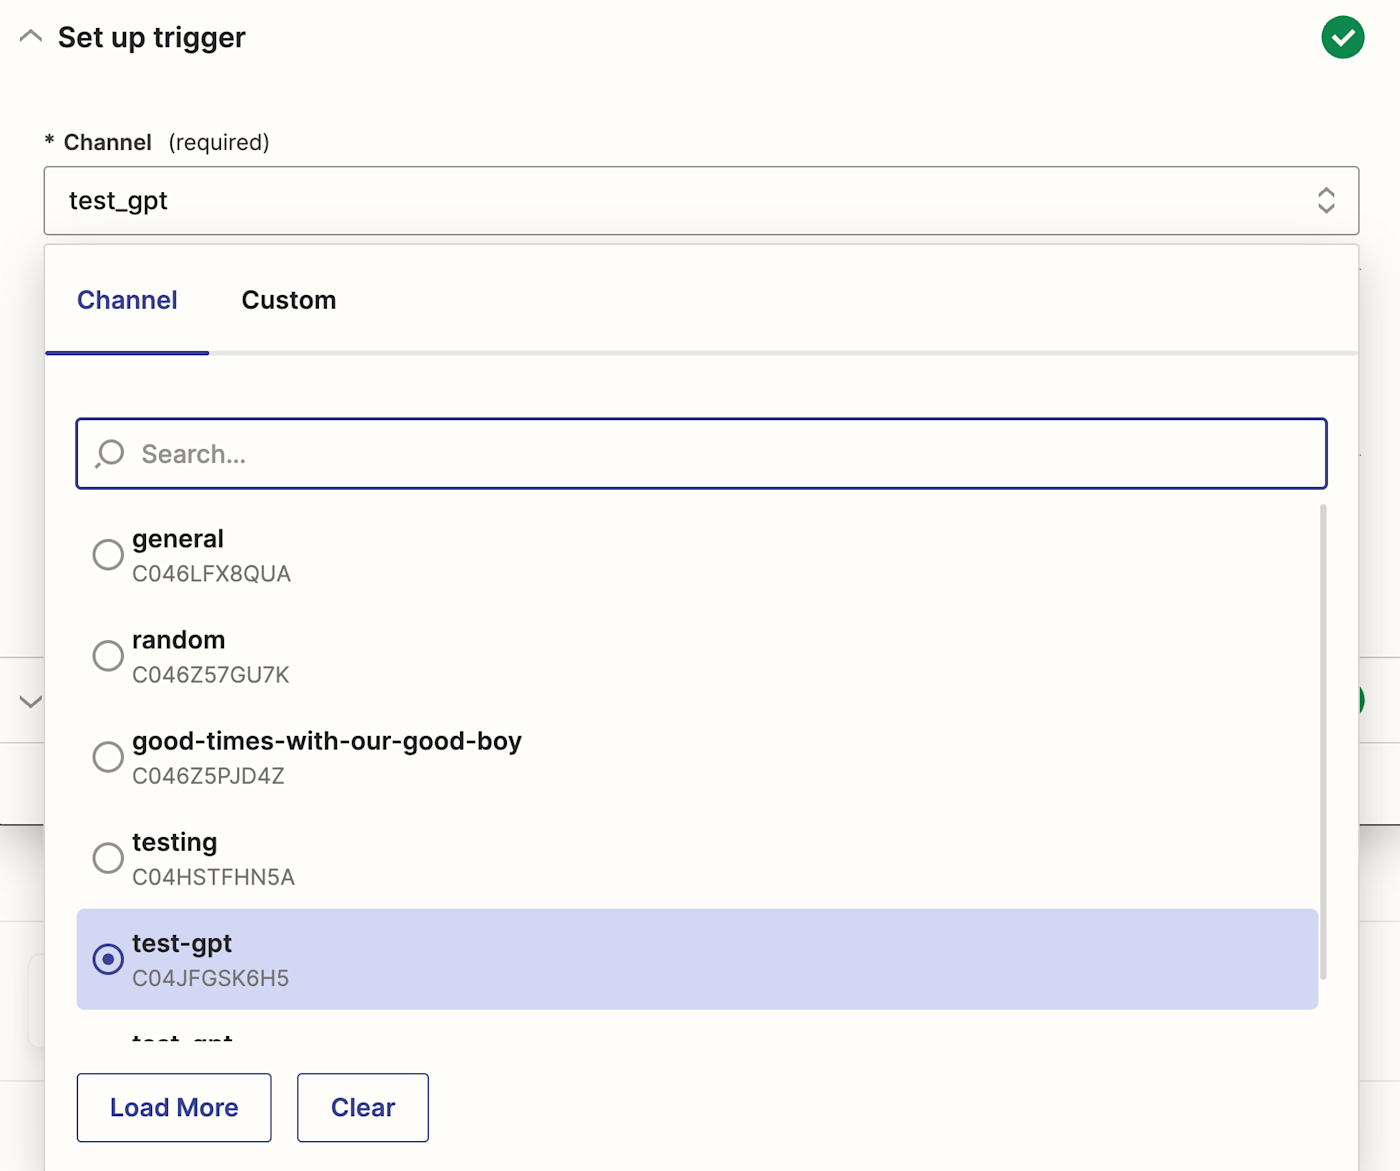 Click Continue. Now, you need to test your trigger. Zapier will find a recently posted message in your chosen channel and use it to set up the rest of your Zap. Click Test trigger. Once the trigger is working properly, click Continue. 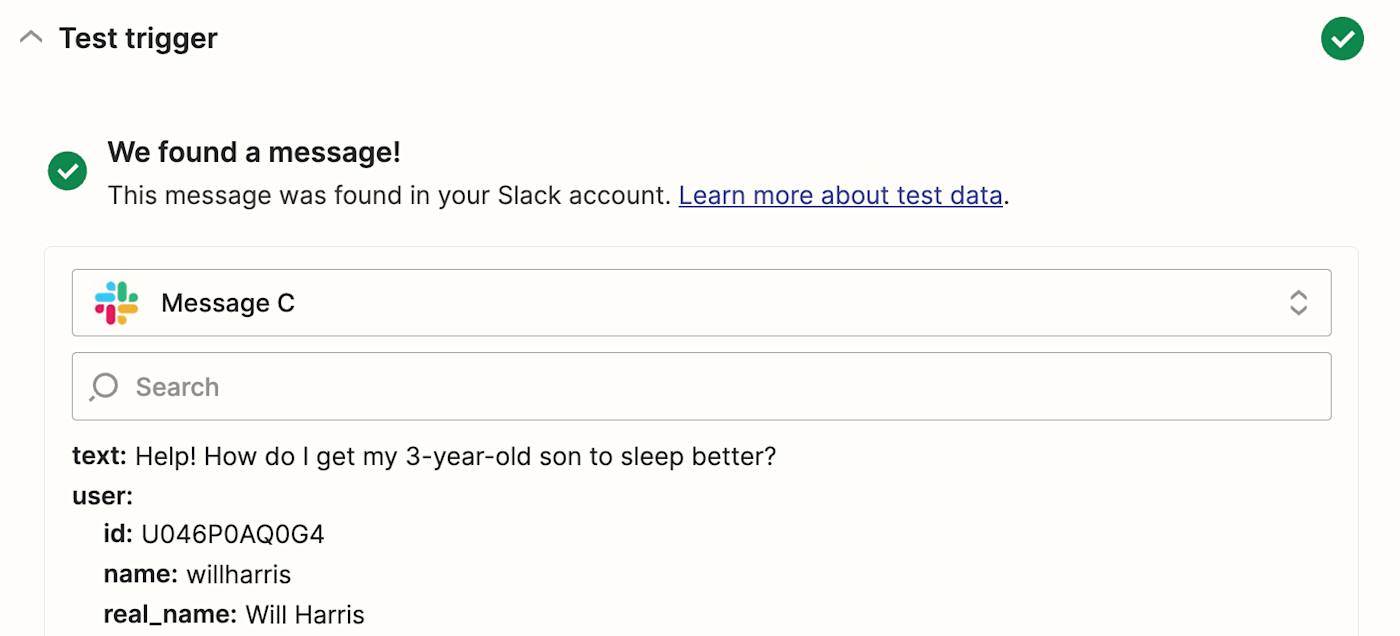 Set up your ChatGPT action Set up your ChatGPT actionNow let's set up your action—the event your Zap will perform once it's triggered. Choose ChatGPT as your action app and Conversation as your action event. Click Continue.  Next, a pop-up window will appear asking for the OpenAI API key that you copied earlier. Paste it into the API Key field, and click Yes, Continue to ChatGPT. 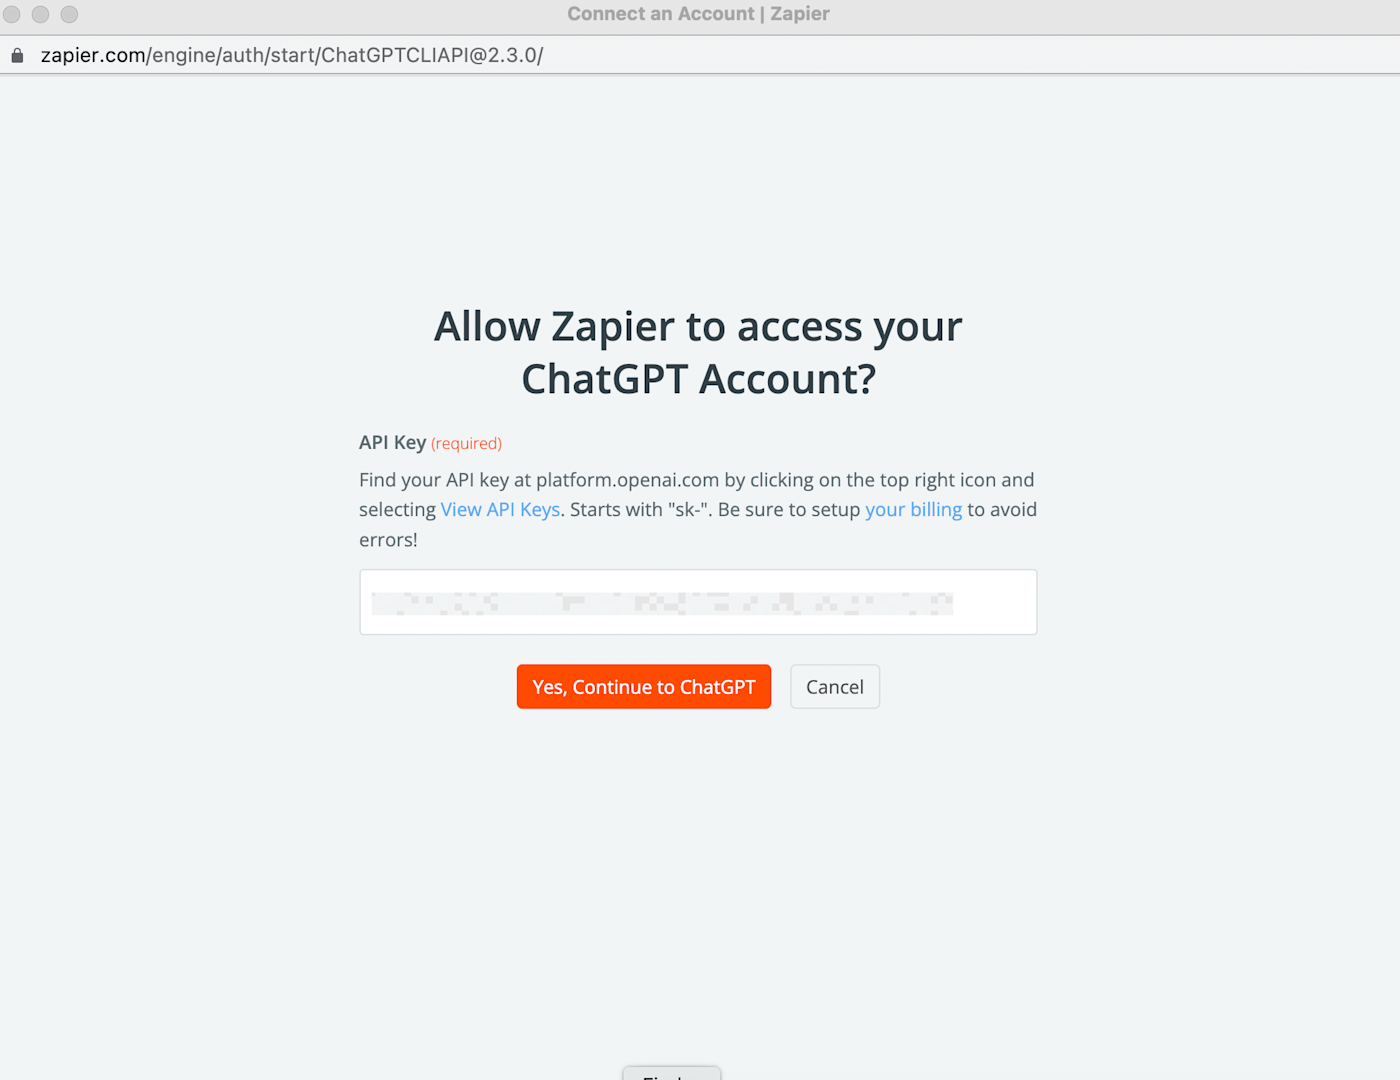 Next, you need to tell Zapier how to send your prompt to ChatGPT. You can pull in data from your Slack message by clicking inside any empty field and picking an option from the Insert Data dropdown. Learn more about field mapping in our Zapier quick-start guide.
For this example, you shouldn't need to add any more context than the text from the Slack message itself. If you were using Zapier and ChatGPT for something different, like writing business emails, though, your prompt field would probably need a bit more guidance. 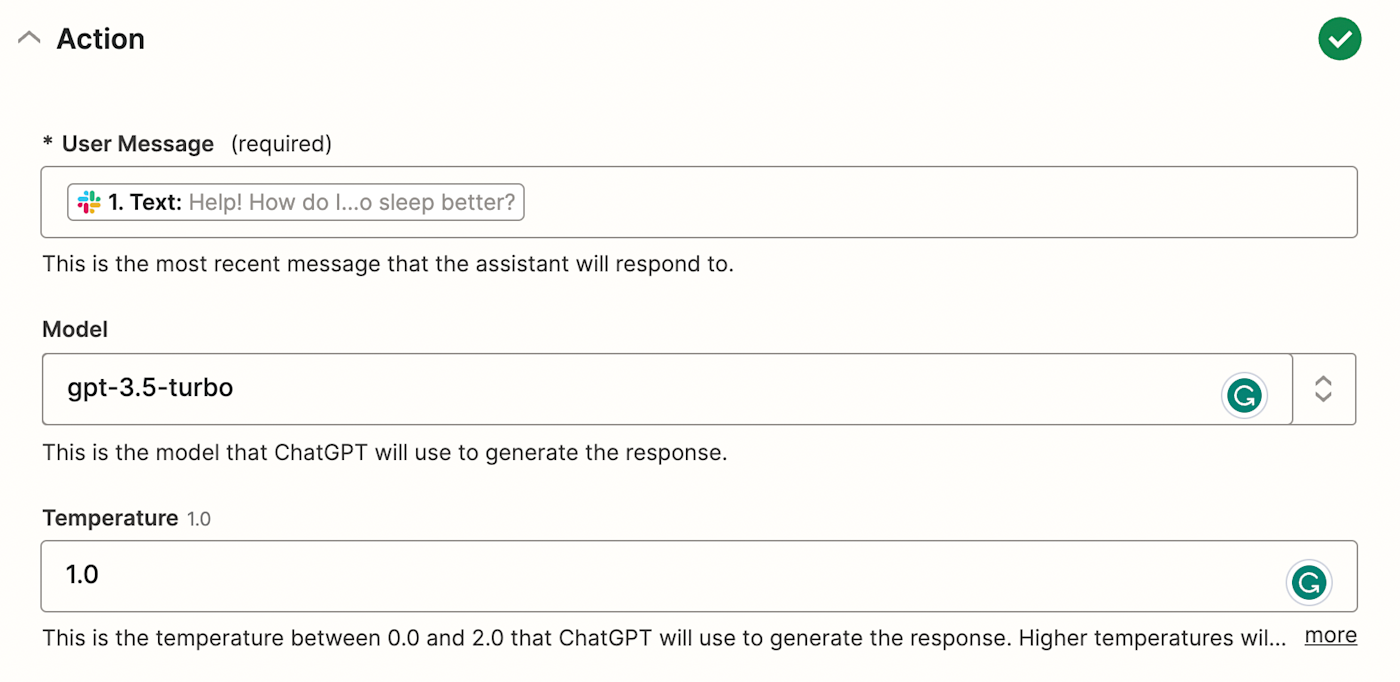 From here, you can also adjust the temperature (creativity level) of your response from ChatGPT, as well as other fields like additional instructions to ChatGPT, and a name for your ChatGPT assistant. If you want ChatGPT to remember this conversation, you'll want to include something in the Memory Key field, like the Slack user's user name for example. If left blank, you can still talk to ChatGPT in Slack, it just won't remember the conversation. Once you've customized this step, click Continue. Next, you'll test your action. Click Test & Review or Test & Continue, and Zapier will pull the response from ChatGPT, according to how you customized your fields. 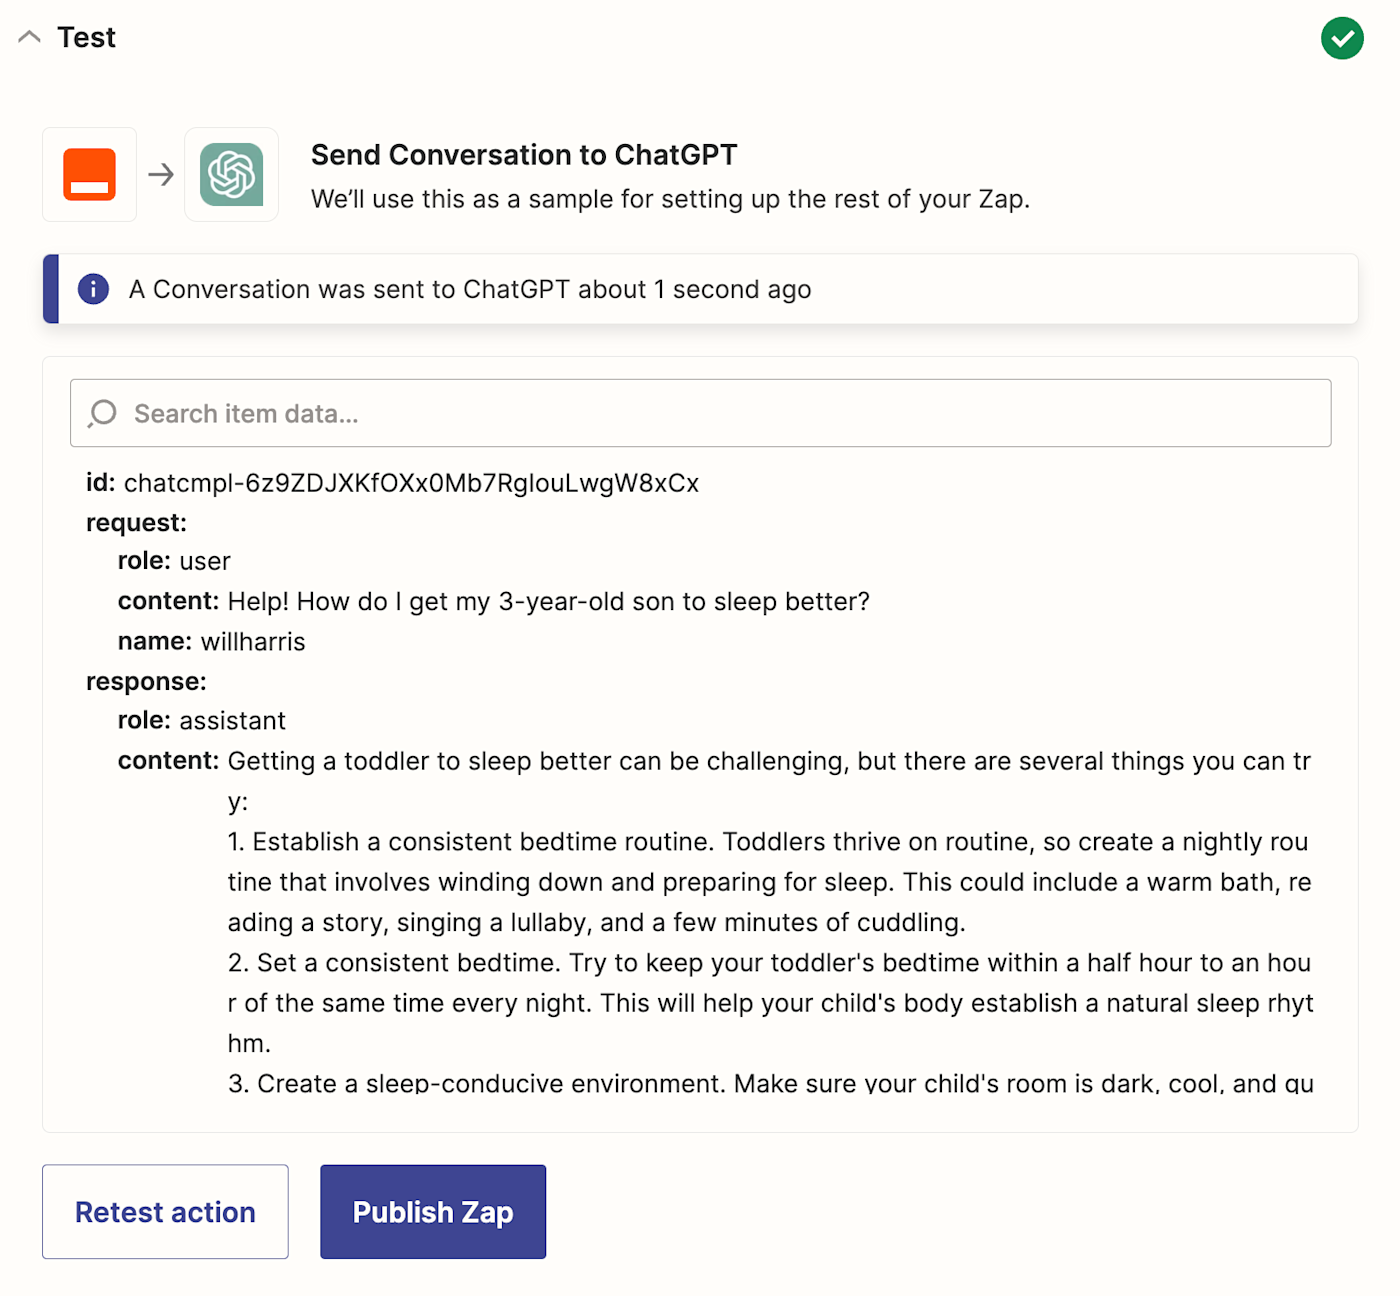 Once your trigger is working, click the + button at the bottom of your screen. 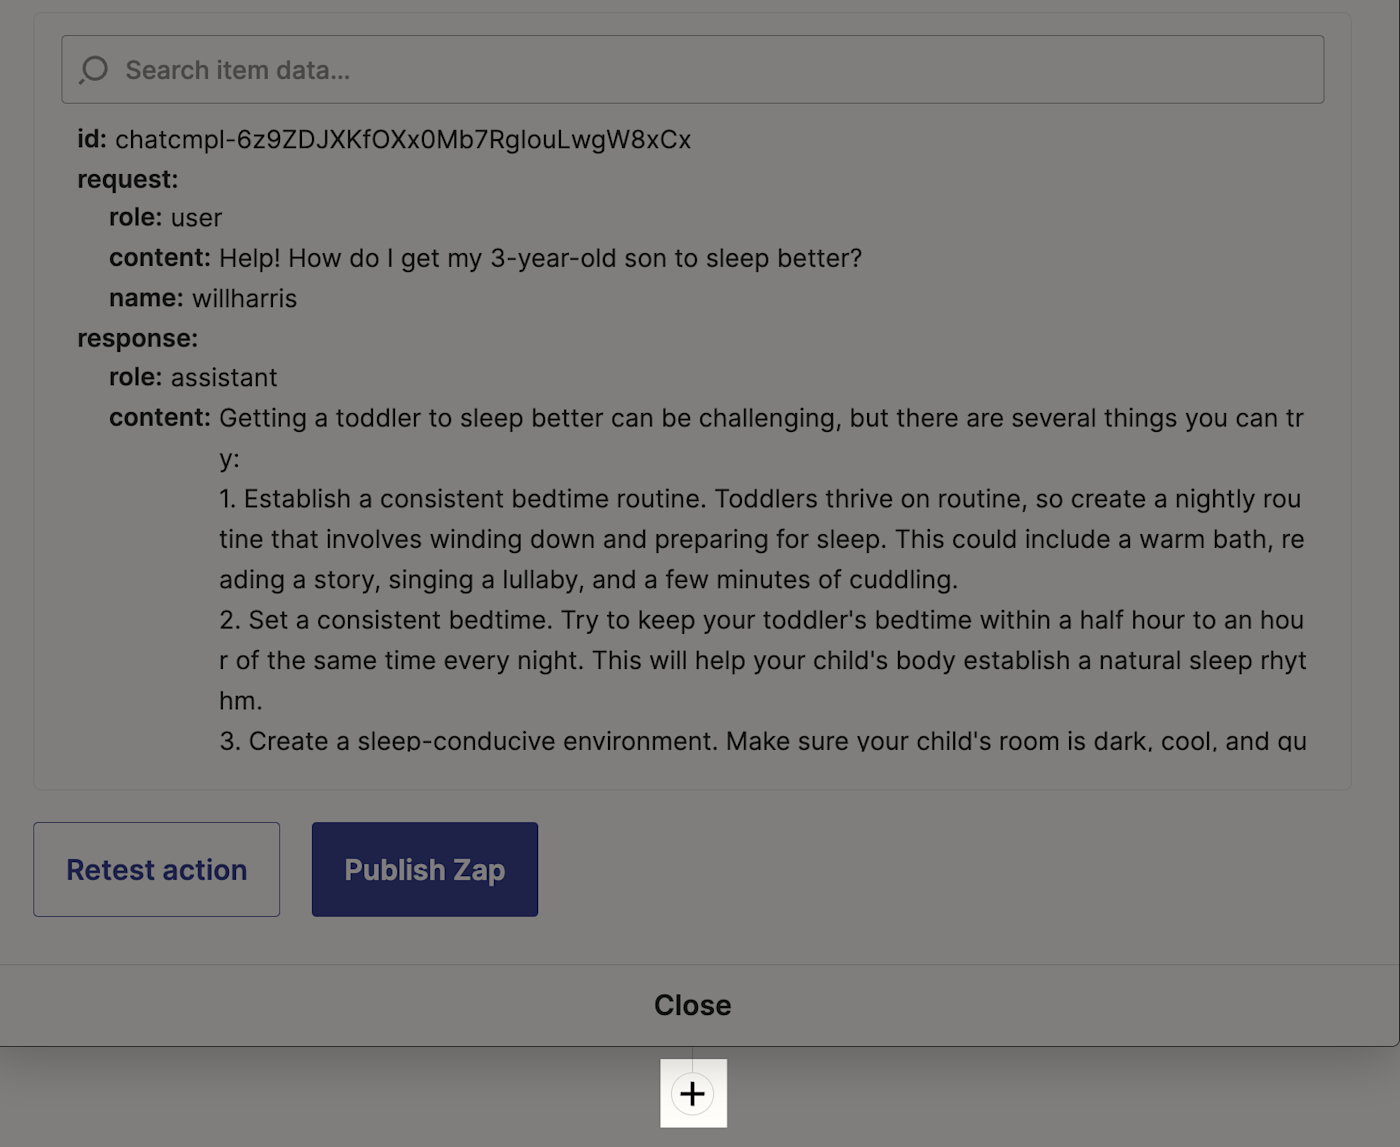 Set up your Slack action Set up your Slack actionNow, you'll set up the step that sends your ChatGPT response to Slack. Choose Slack for your action app and Send Channel Message for your action event. 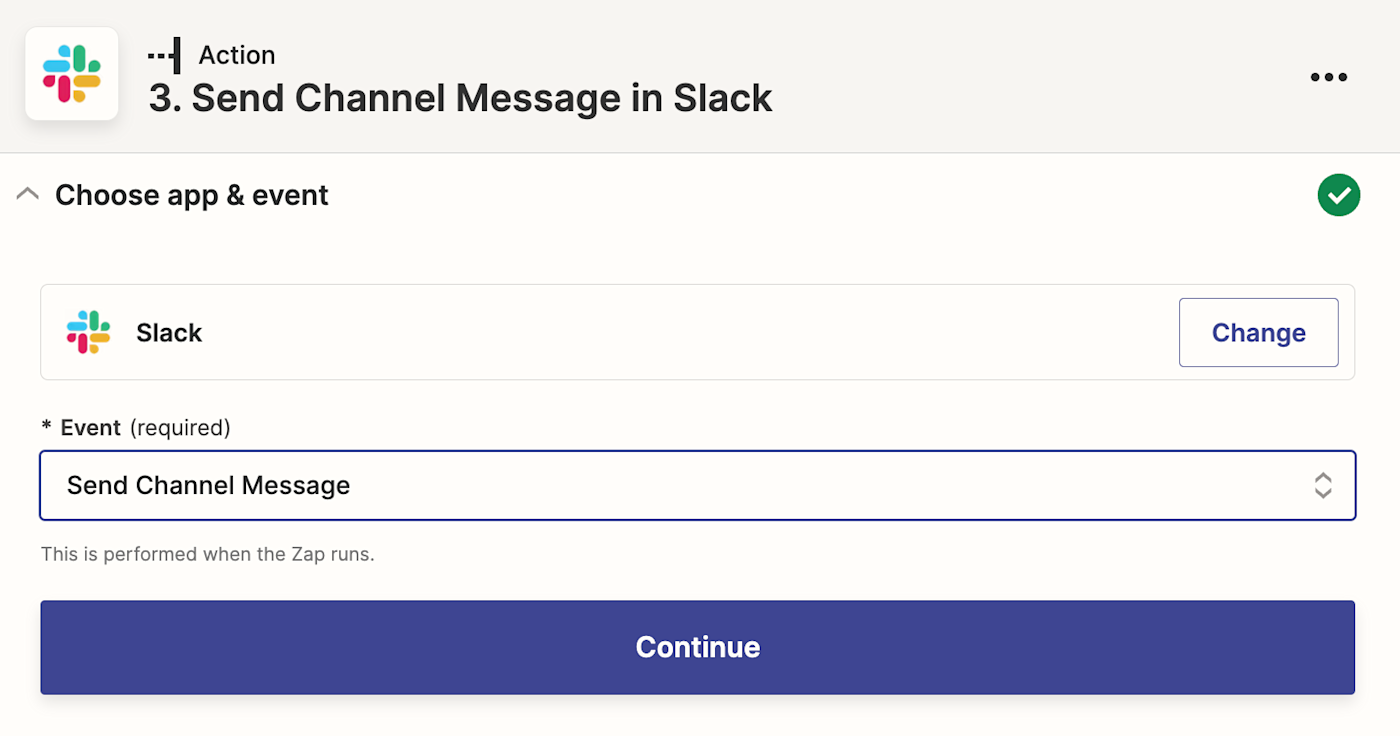 Again, you'll be asked to connect your Slack account. Connect the Slack account where you want the message to be posted. In most cases, this will be the same Slack account you connected earlier. Click Continue. Now it's time to set up how your message from GPT-3 will look in Slack and where it'll be posted. Add any other context you want to the Message Text field, and make sure to include Assistant Response Message from the data dropdown, as that contains your response from ChatGPT. 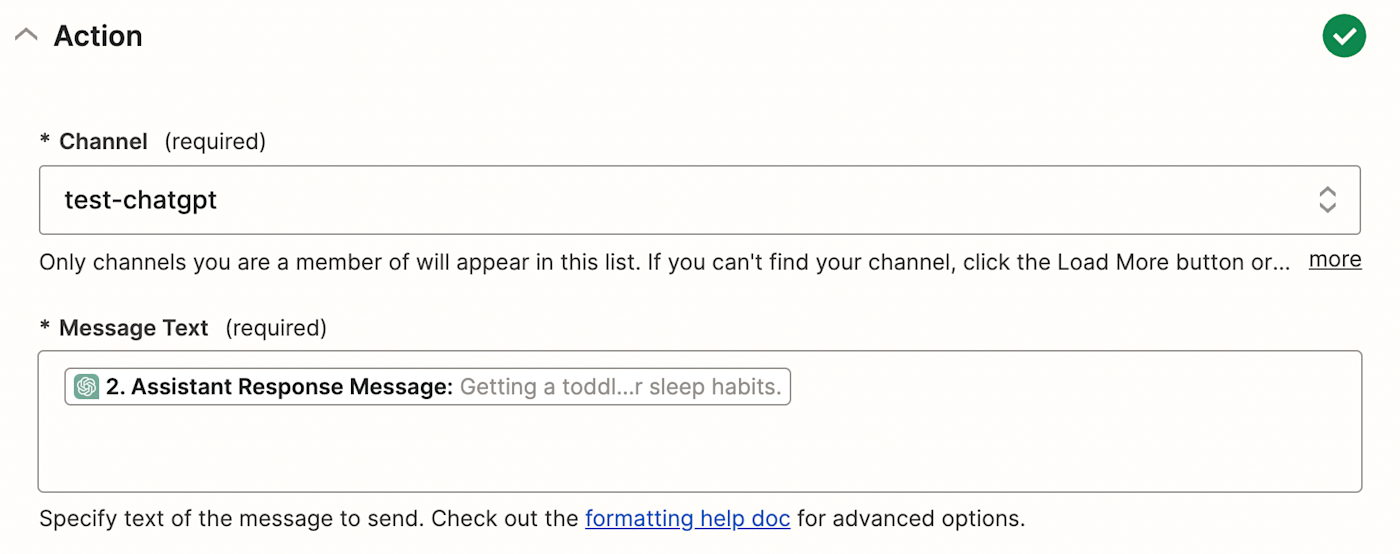 You can also customize where the message comes from, such as from a bot or yourself. If you choose a bot, you can customize things like the bot name and the icon that appears next to it. 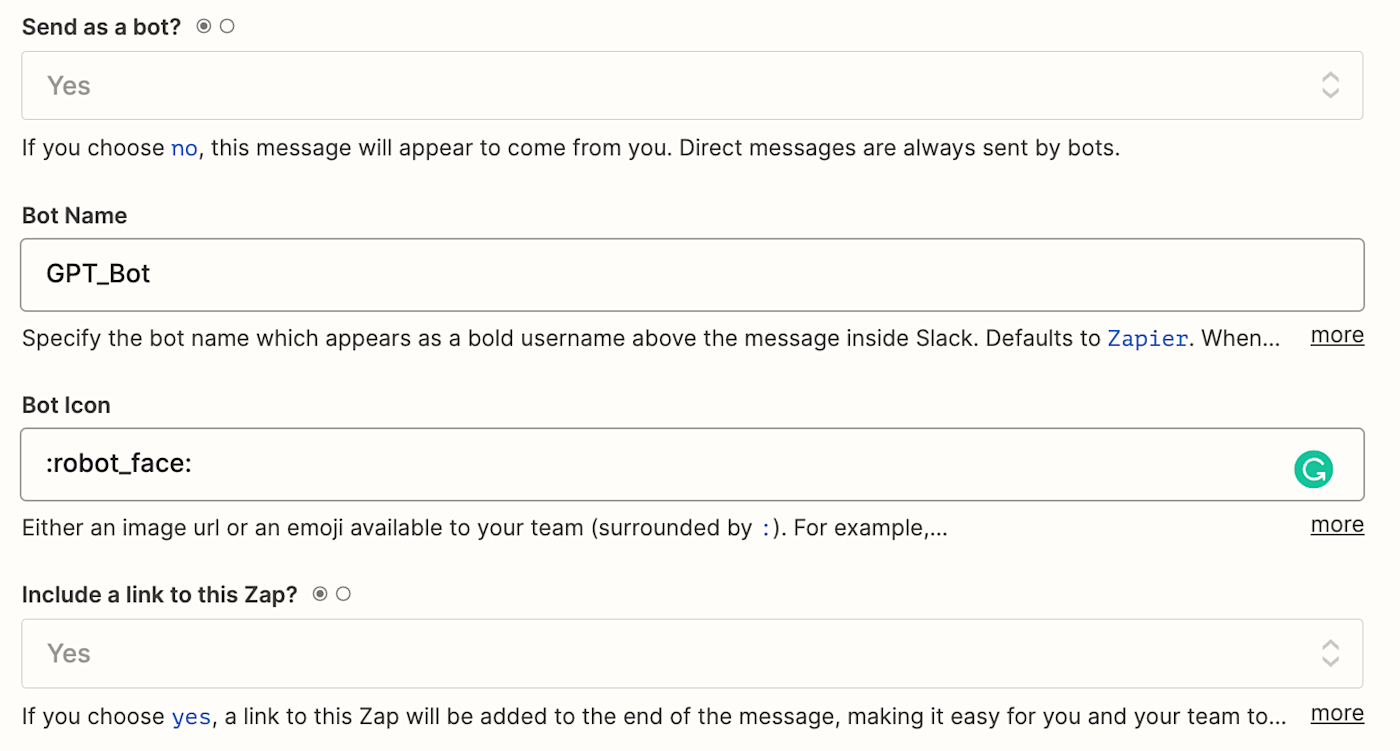 If you'd like your bot to reply in a thread rather than in your Slack channel, navigate down to the Thread field. Click in the field and select the timestamp (shown in Zapier as Ts) of the parent message in the dropdown to let Zapier know which message to create a thread for.  Once you've customized your message, click Continue. Now it's time to test your action. Click Test action. Zapier will post a message in your chosen Slack channel to make sure your Zap is working. 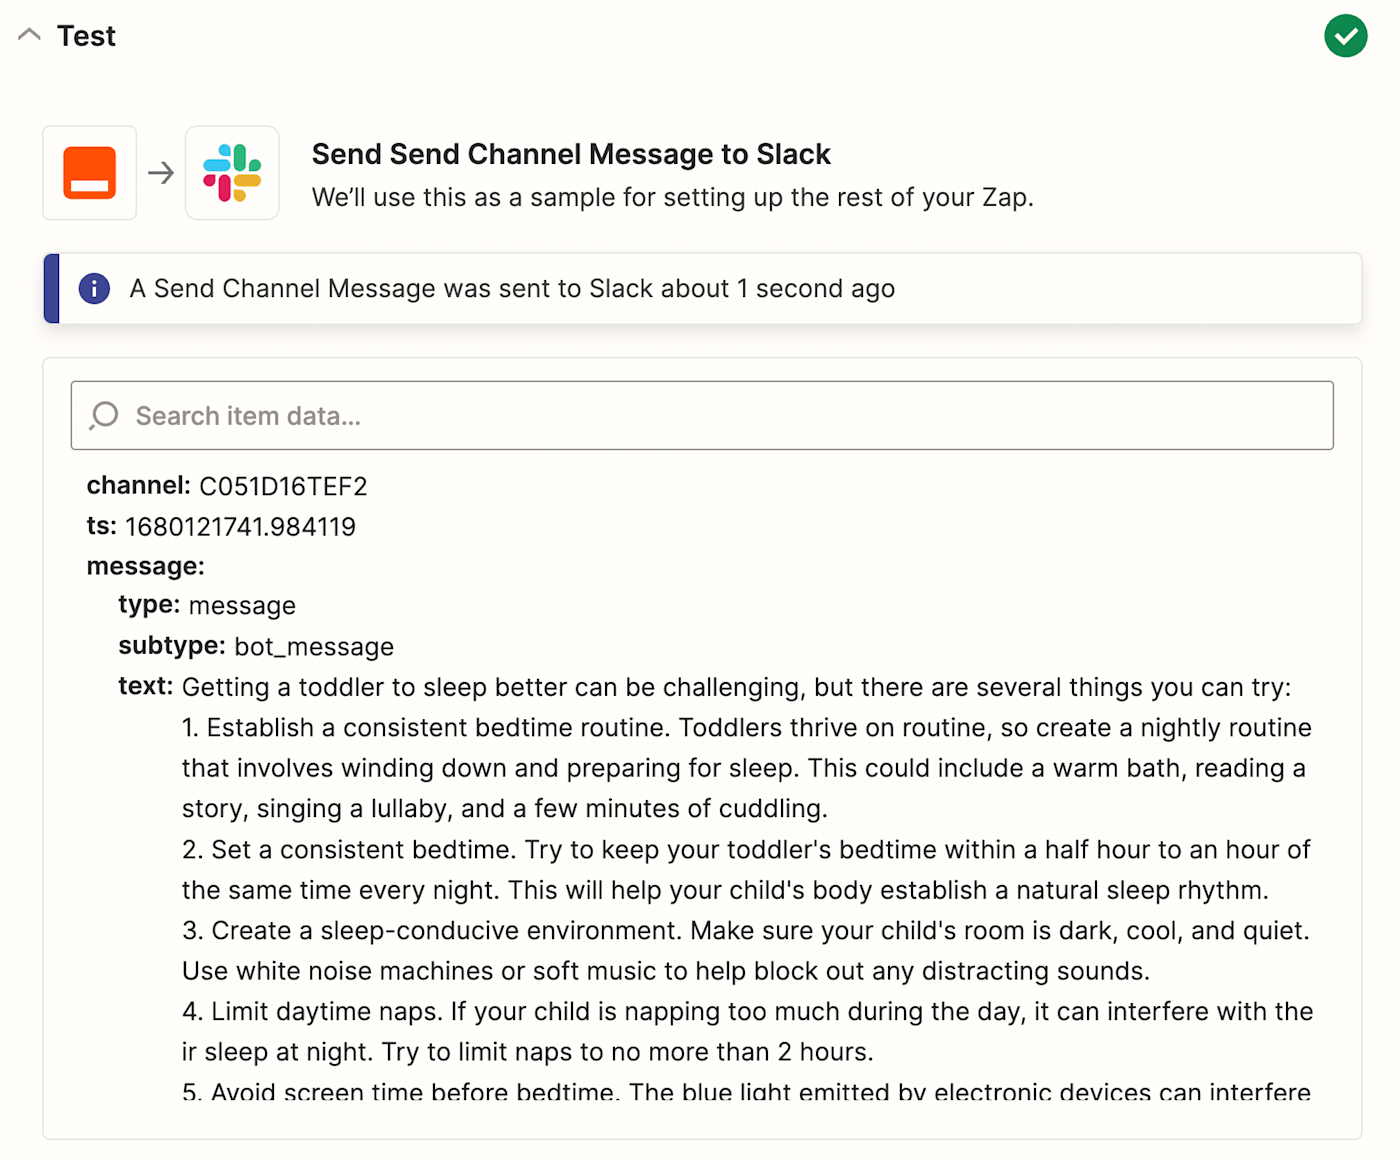 If everything looks good with the message thread Zapier posted to your question, then your Zap is ready to use. If something looks off or your test fails, go back and adjust until your message looks how you'd like it to. 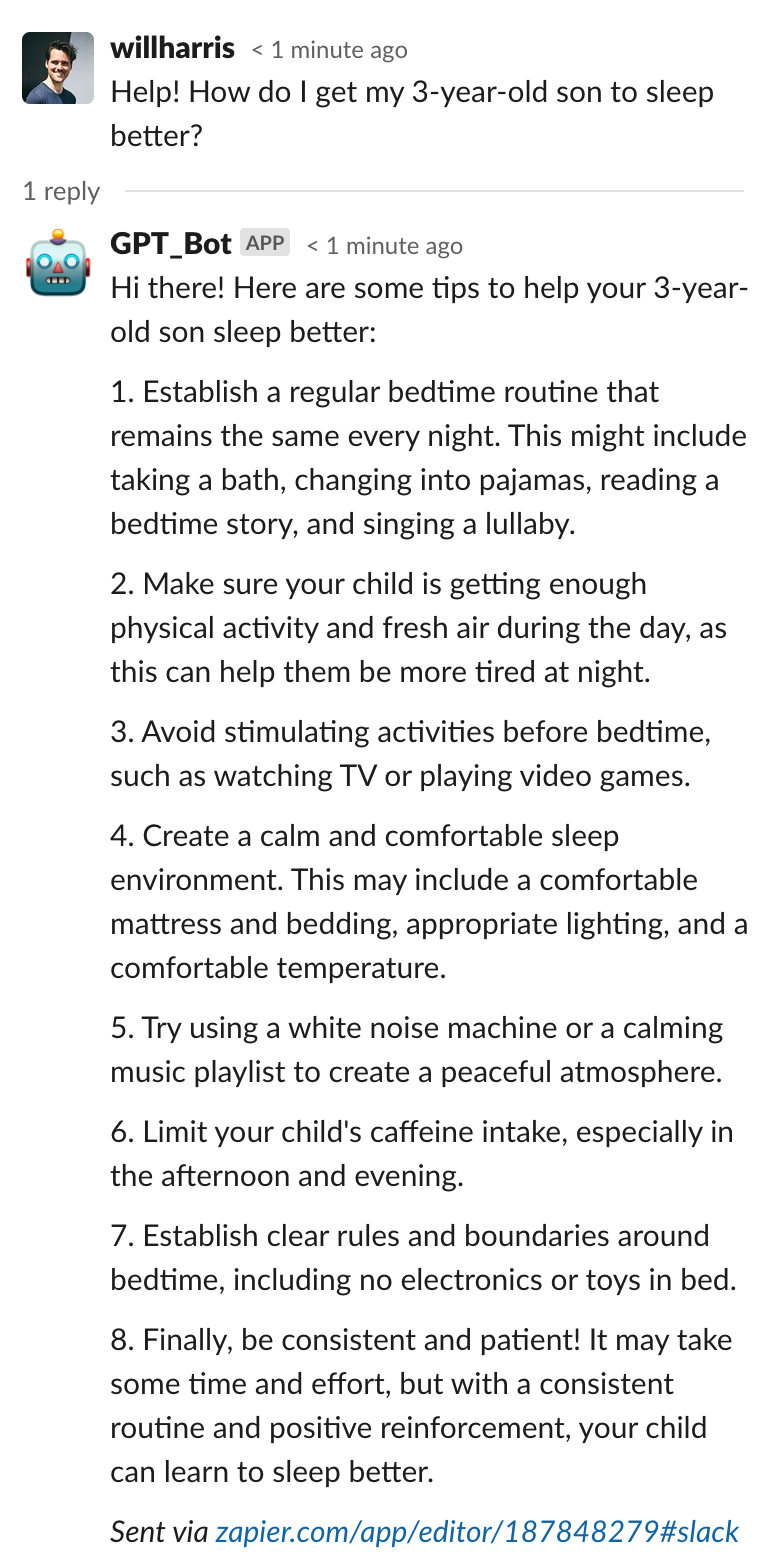 Build a ChatGPT slash command bot Build a ChatGPT slash command botNow you know how to integrate ChatGPT with Slack so that it replies to particular channel messages, but what if you don't want to limit yourself to just one channel? With a slash command bot, you can send prompts from any channel in your Slack account. Start new conversations with ChatGPT from caught webhooks and post the replies in a Slack channelStart new conversations with ChatGPT from caught webhooks and post the replies in a Slack channelTry itTo create a command bot in Slack, you'll need to start by building a Slack app. Don't worry, it's not as intimidating as it sounds. First, go to api.slack.com/apps and click Create an App. Then, give your app a name, and pick the Slack account where you want to use your bot.  Next, add slash commands to your bot by selecting the Slash Commands button, then clicking Create New Command. 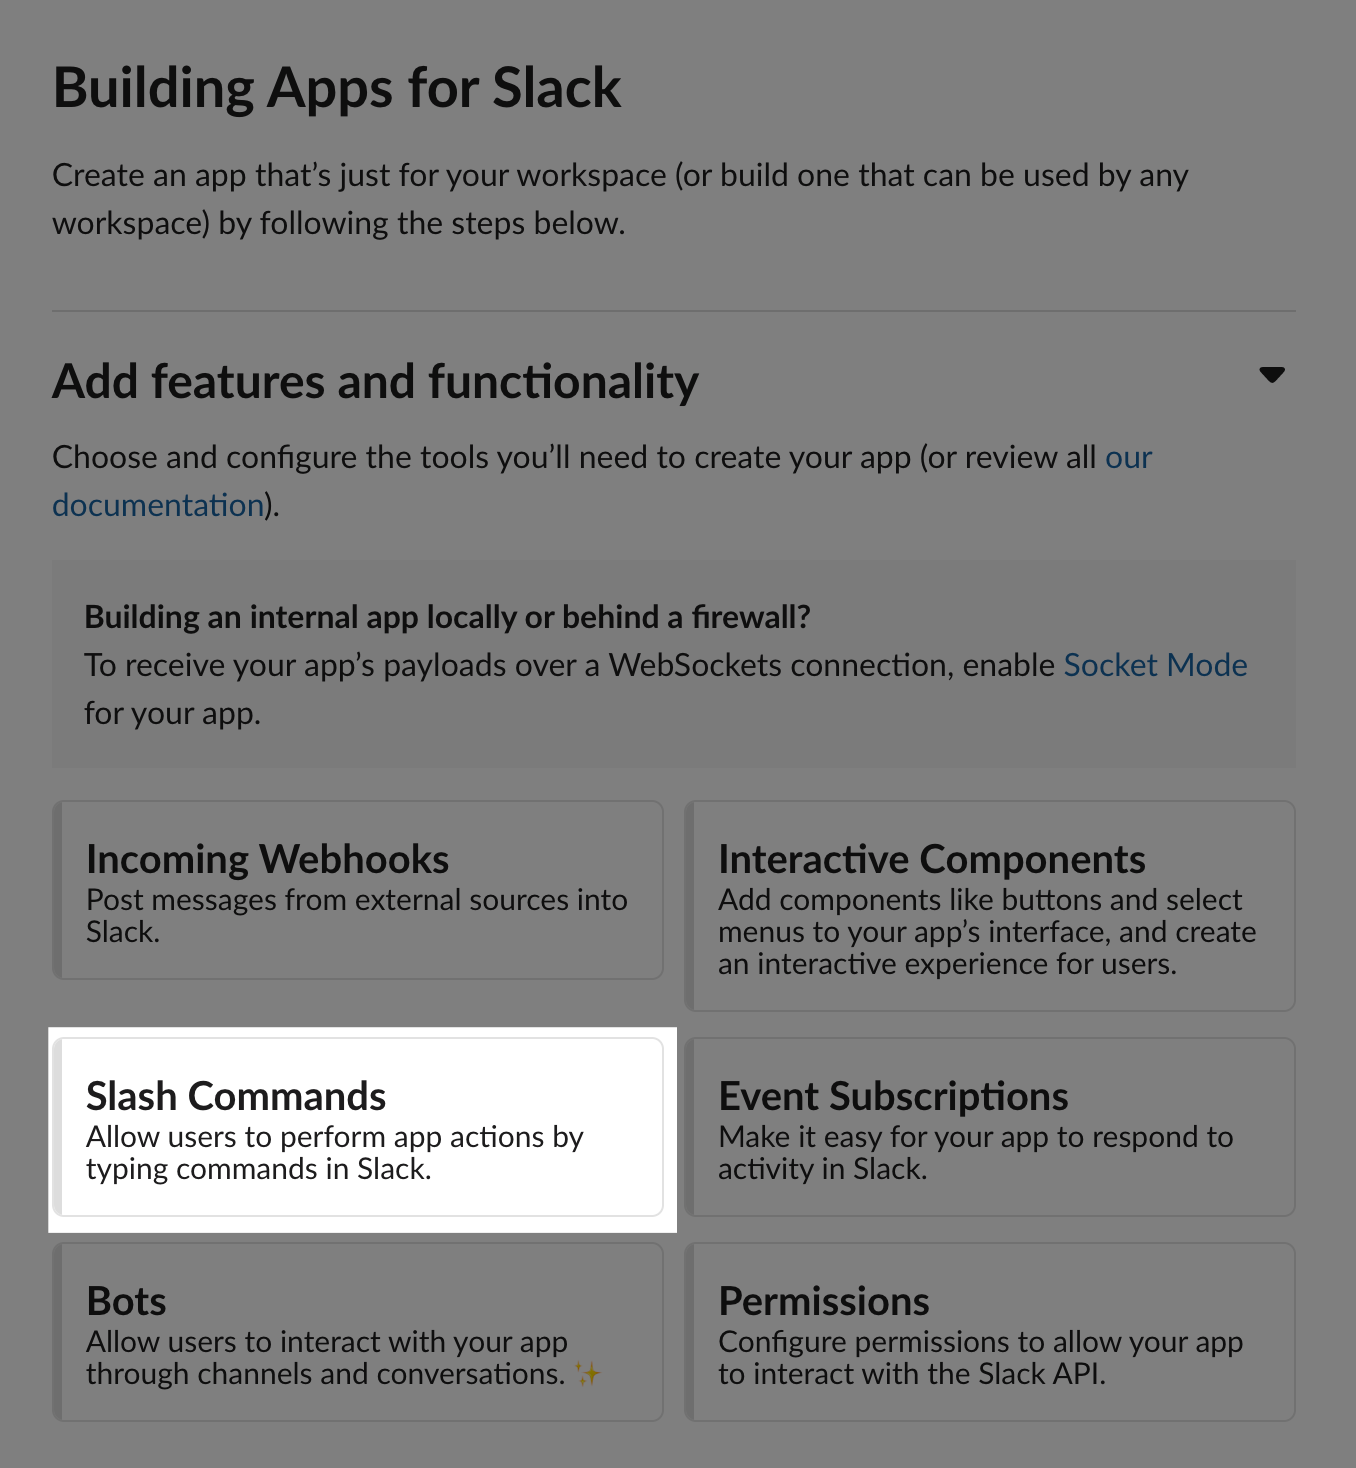 From there, choose the word or phrase you want to use as your command. Then, you can add a short description of what the command does, as well as a usage hint that lets people know how to use it. 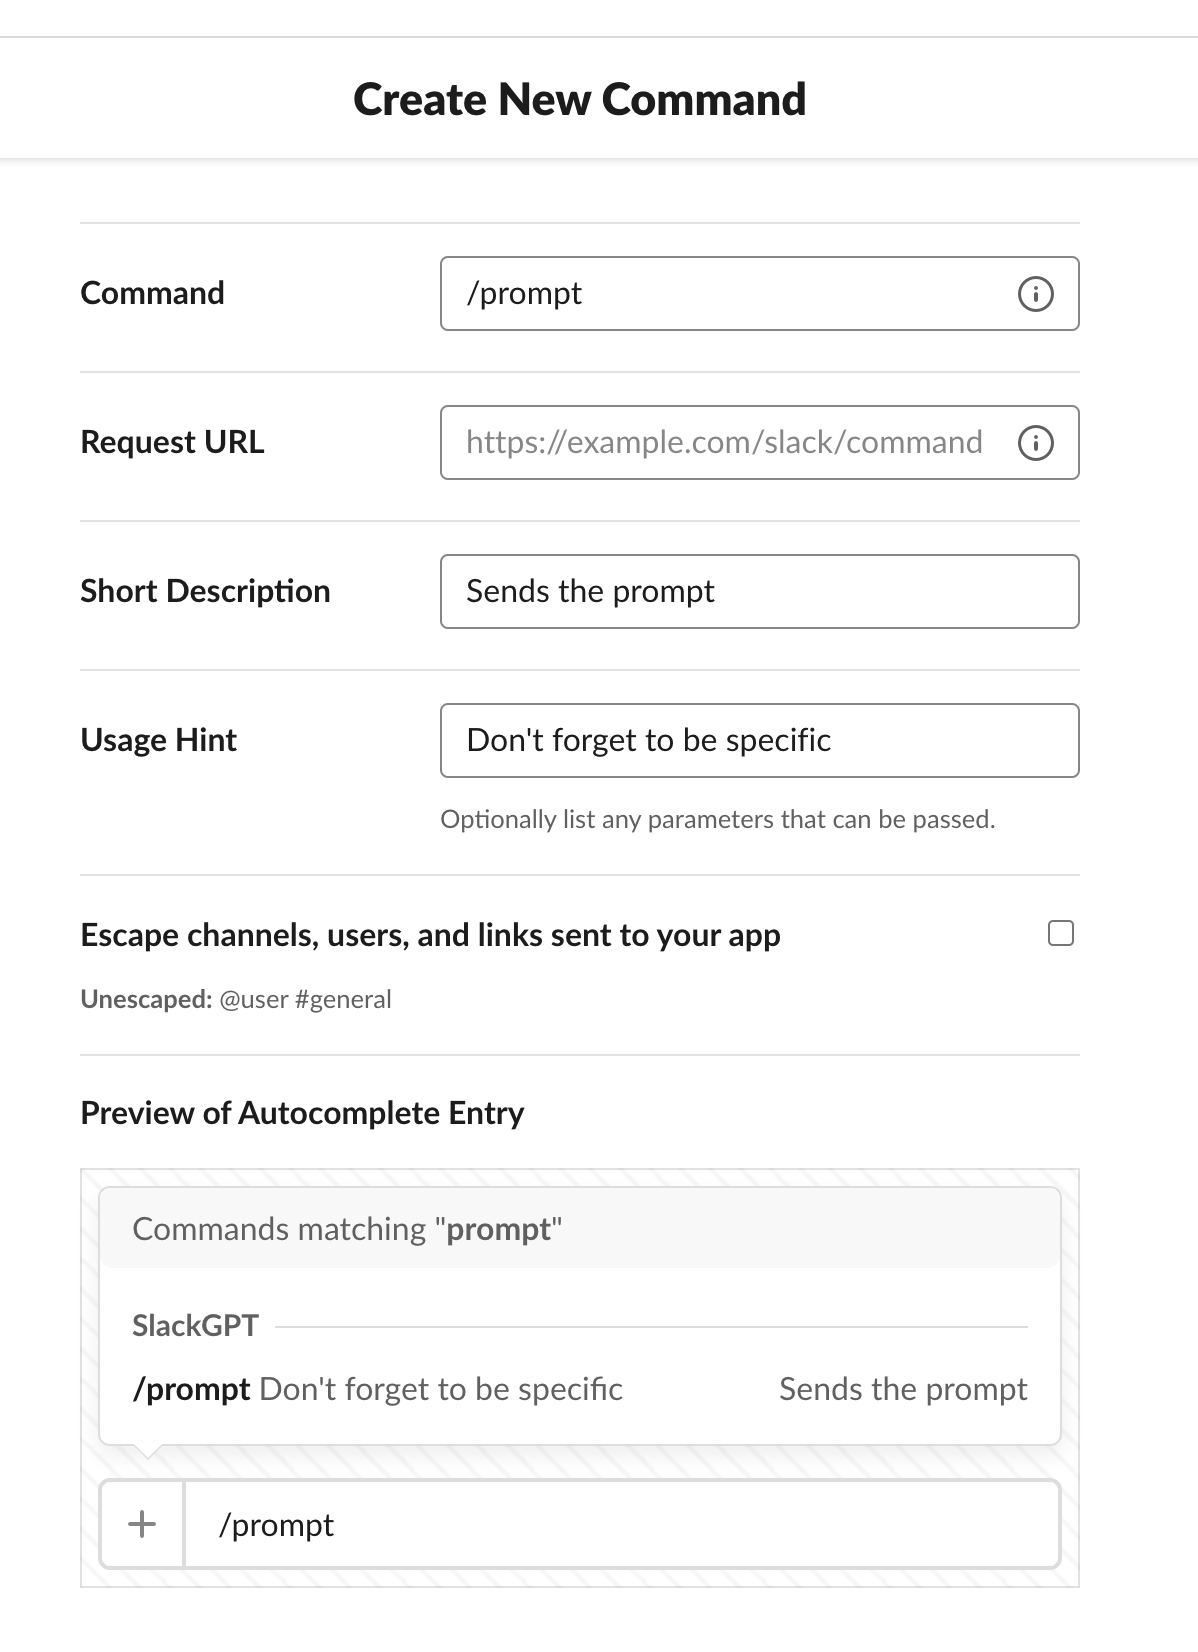 We still need to add the Request URL, which we'll get from Zapier's webhooks integration. In a new tab or window, make a new Zap using Webhooks by Zapier as the trigger app and Catch Hook as the trigger event. 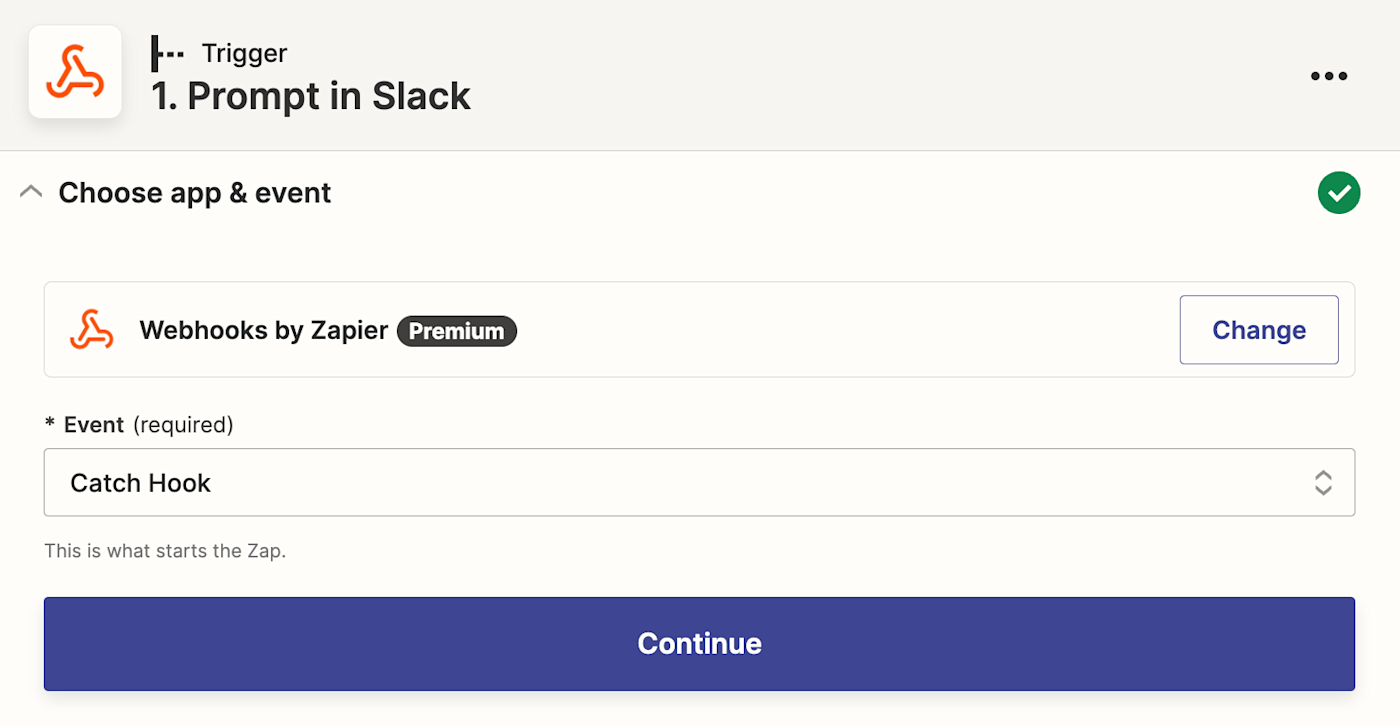 Click Continue. Next, your webhook URL will appear. Make sure you copy it. 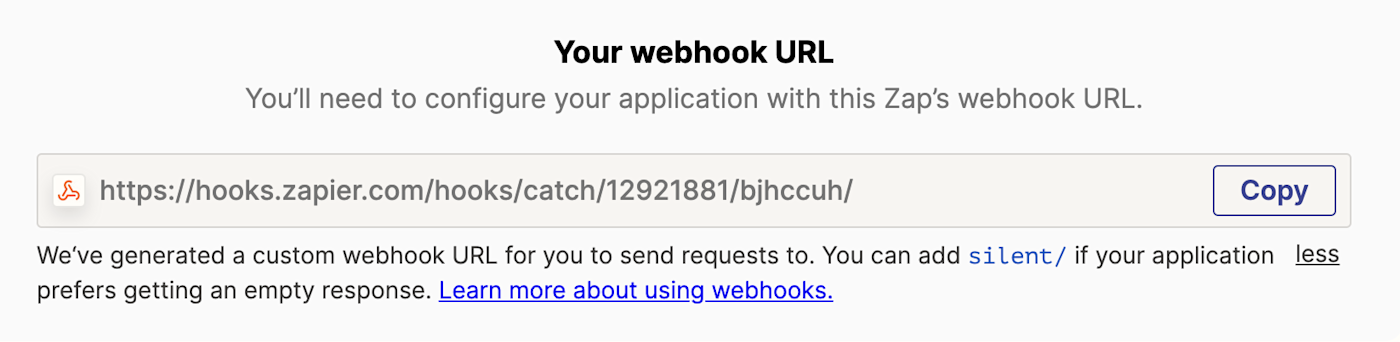 With that webhook link copied, go back to your Slack slash command's setup page and paste the link into the Request URL field. Then, save your settings. Now it's time to test your slash command. Zapier will use the information from your test throughout the rest of your Zap. Just open Slack, and type in your command followed by the prompt you'd like to send to ChatGPT.  After that, go back to the Zap editor and click Test Trigger. Zapier will pull in your test prompt from Slack, as well as other information like the channel and username. 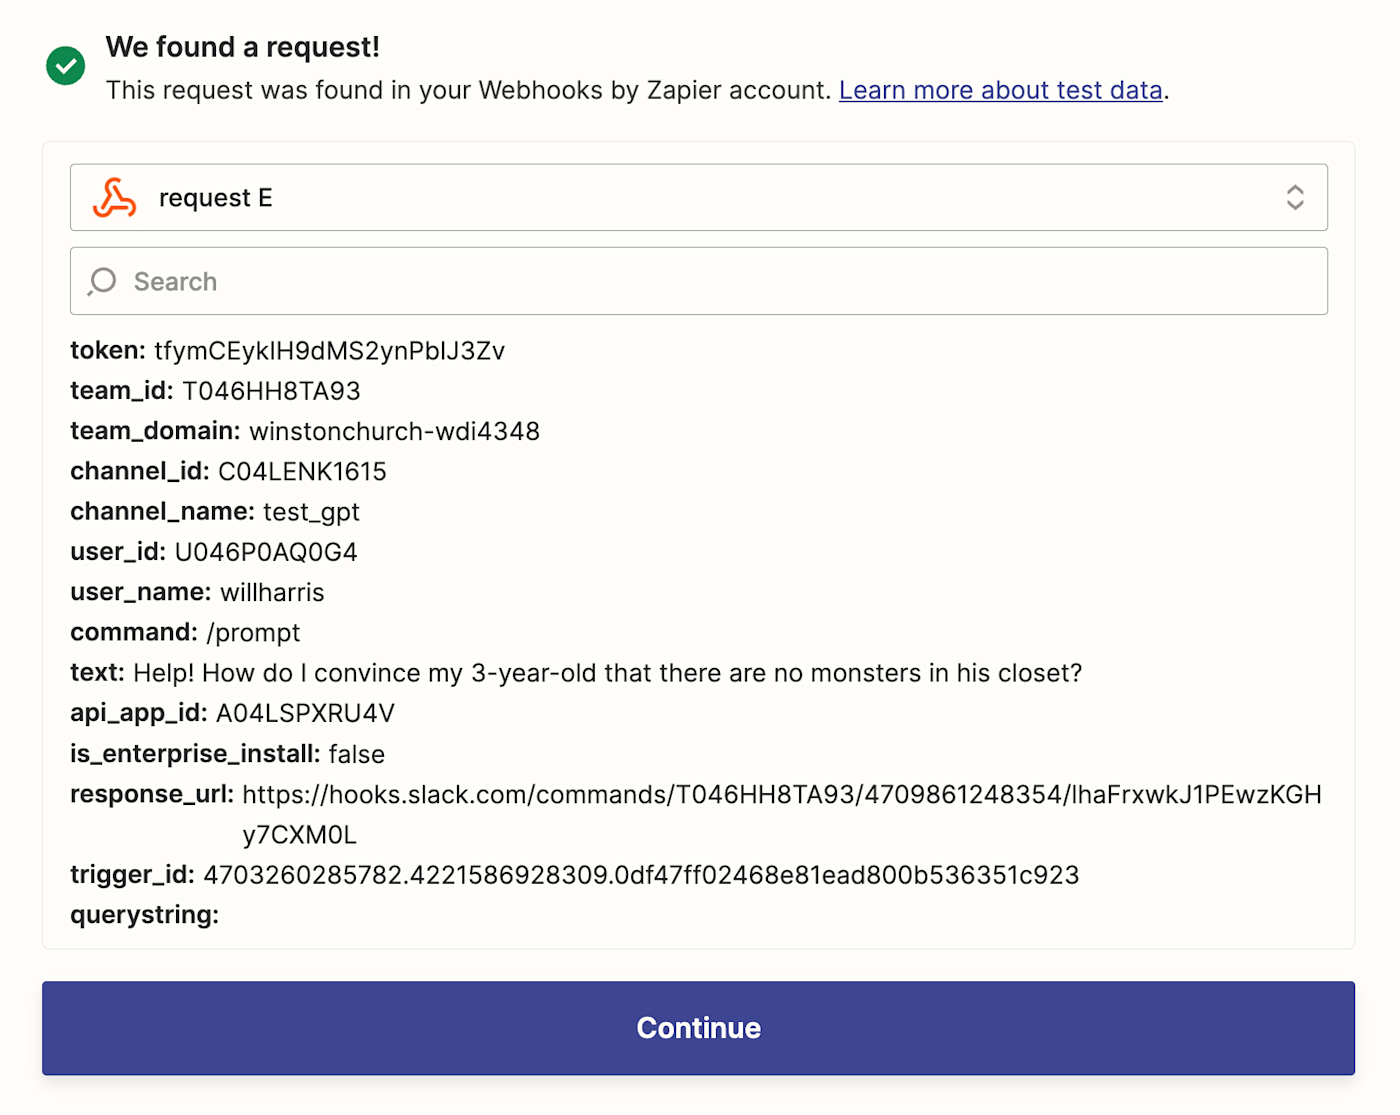 Once you see your webhook working correctly, click Continue. Set up your ChatGPT actionJust like the last Zap we built, it's time to set up our ChatGPT action step. Start by choosing ChatGPT as your trigger app and Conversation as your trigger event. Click Continue. 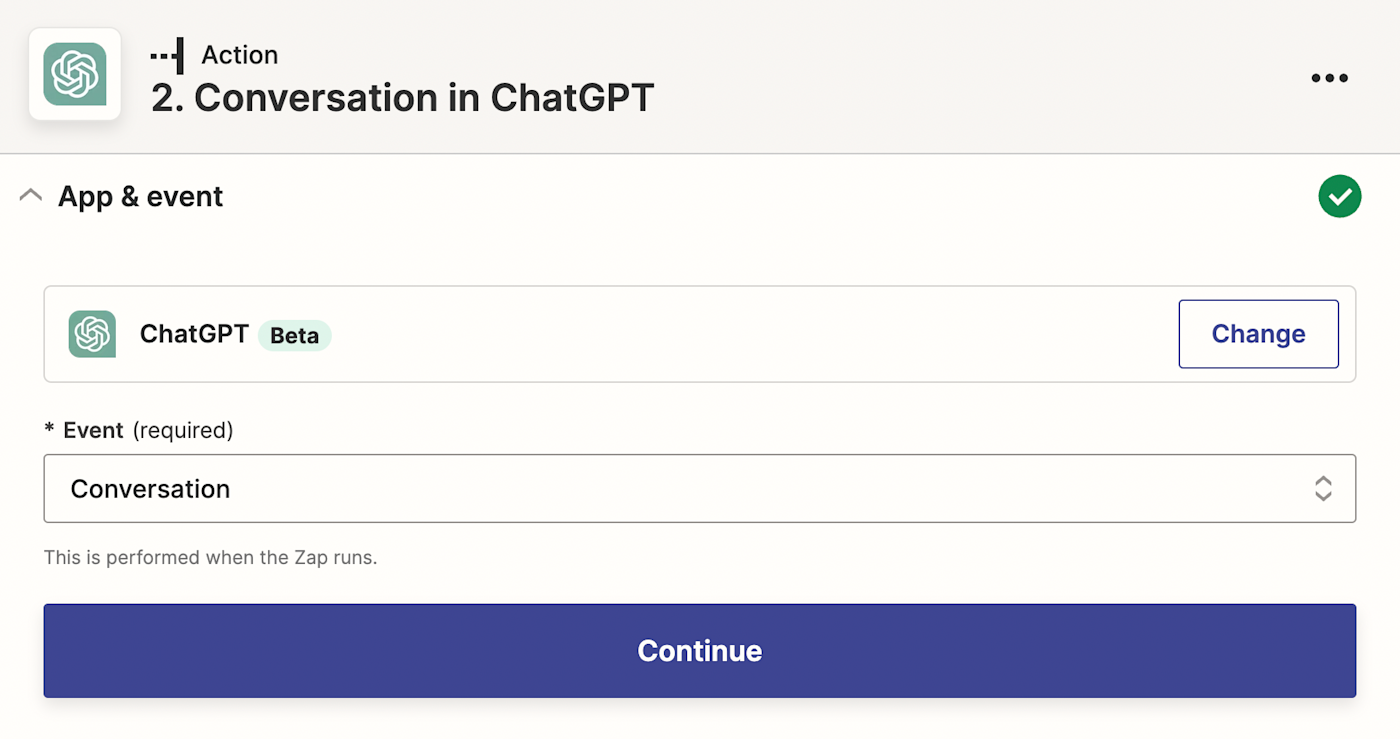 Then, again, you'll connect your OpenAI account with Zapier and click Continue. Next, it's time to customize how you'll send the prompt to ChatGPT. Since your prompt is just going to be what you typed into Slack, click in the User Message field and select Text from the Insert Data dropdown. Then, if you want to adjust the temperature or customize your assistant, you'll do that here as well. 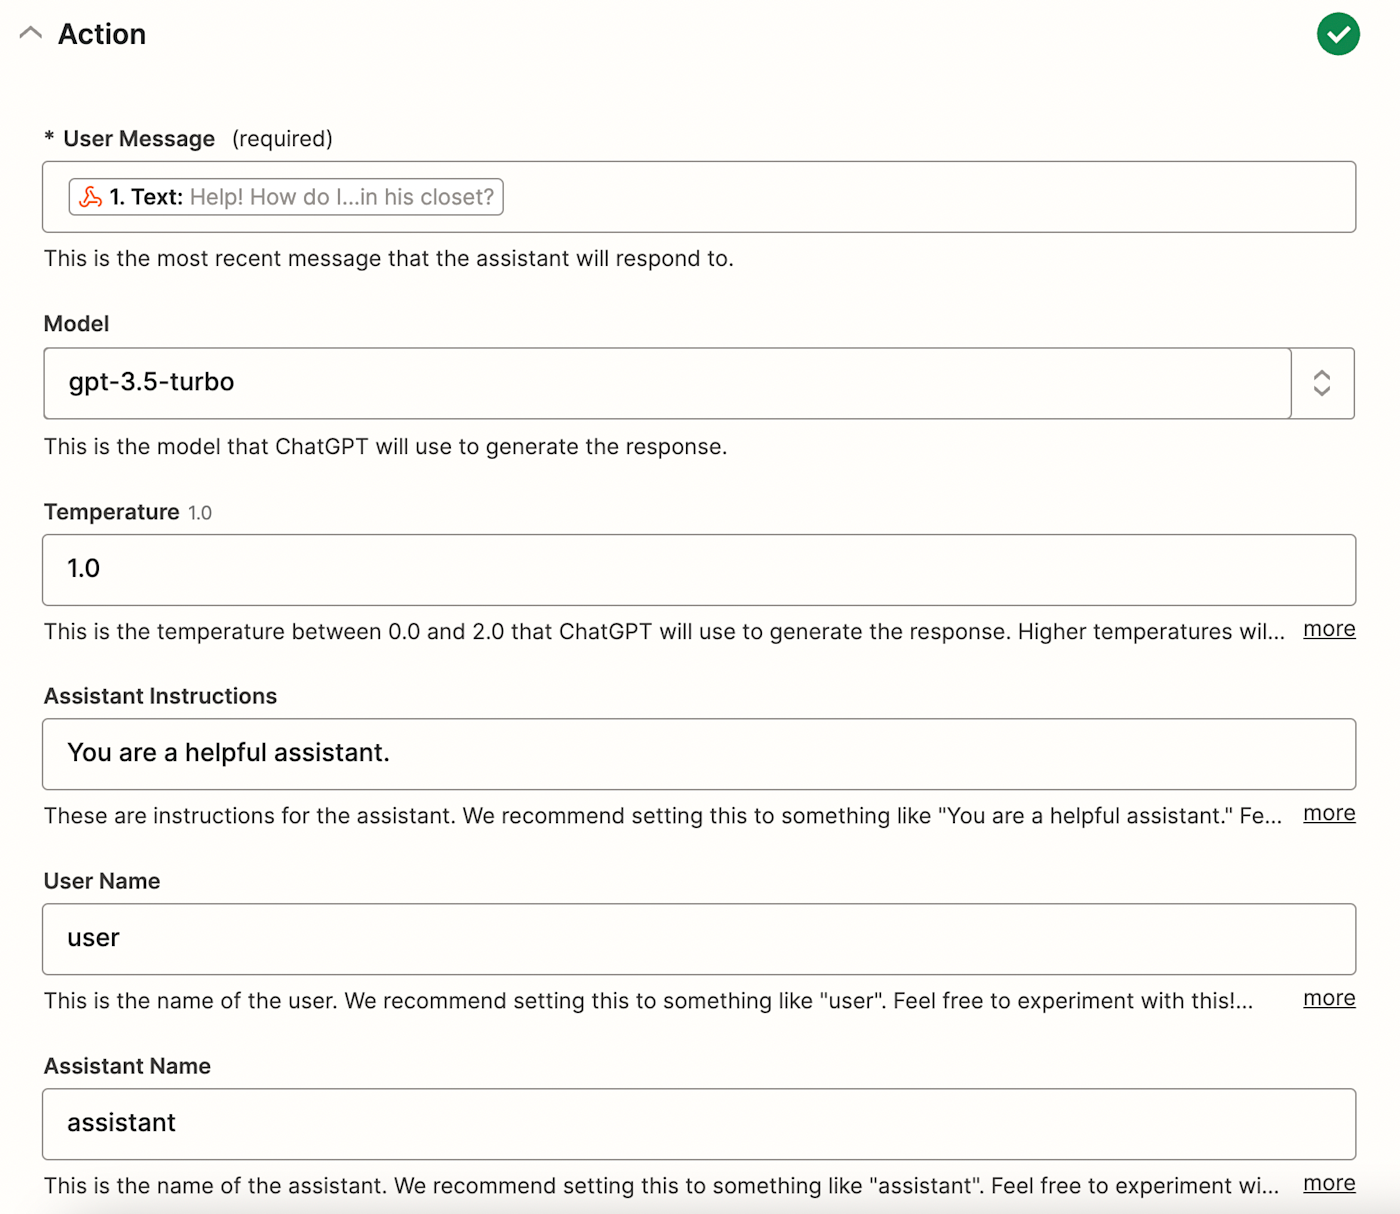 Once you've finished customizing these fields, click Continue. Next, click Test & Review or Test & Continue, and if everything works smoothly, click the + button at the bottom of your screen. Set up your Slack actionNow it's time to set up your Slack action step and customize how your results from ChatGPT look when they make it to Slack. You'll follow the same steps that we did previously. Pick Slack as your action app, choose Send Channel Message as your action event. Then connect your Slack account with Zapier. Now, to customize your message. One of the differences between this Zap and the previous one we built is that we want to be able to post ChatGPT results in any channel, not just one specific one. In the Channel field, rather than specifying one channel, you'll want to pick Channel ID from the Custom tab of the dropdown menu. This will let your Zap know to post your ChatGPT result where your slash command was entered rather than in one specific channel. 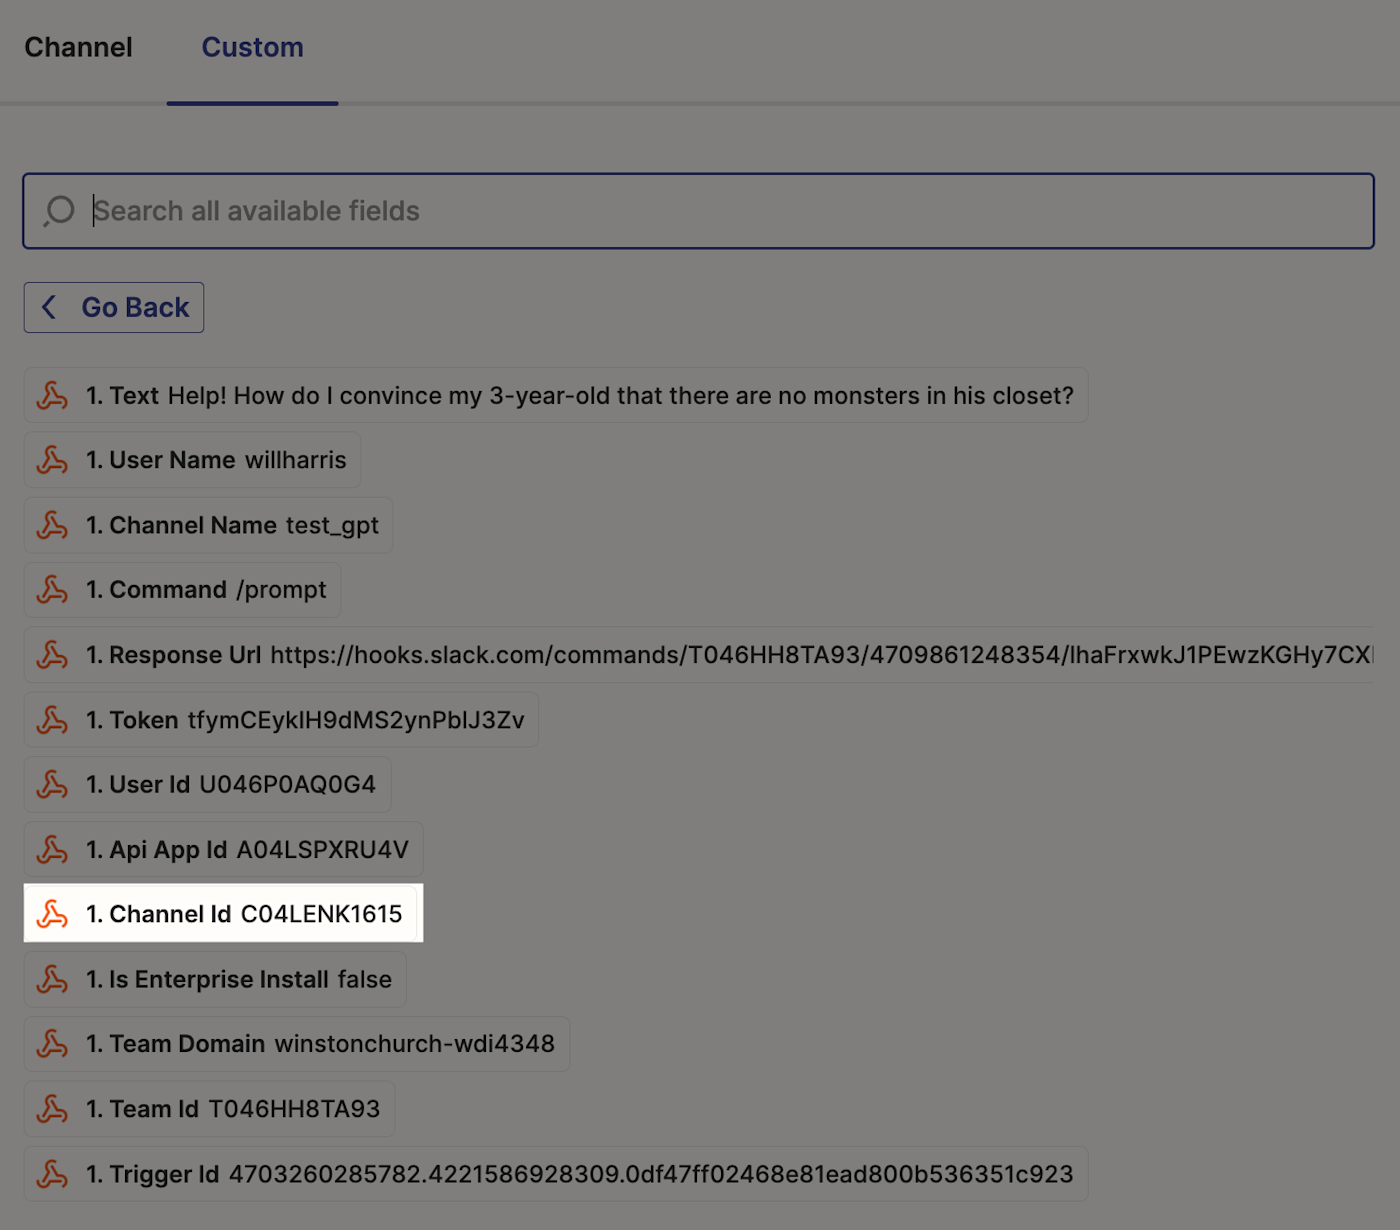 After that, you can customize your message, as well as the name and icon of your bot, just like we did in the previous Zap. Once you're done customizing, click Continue.  Finally, it's time to test your action by clicking Test action. Zapier will send a test message to your Slack channel for you to look at. If your message looks good, you're ready to use your Zap. Or you can tinker with it until your message looks just right. Bring the power of ChatGPT to SlackWe're still in the early days of the AI era, and there's so much to look forward to when thinking about how tools like OpenAI can work with our day-to-day lives. These two automations are just one of seemingly endless ways to use ChatGPT to make work run a little smoother. Make AI work for youDiscover more ways to automate OpenAI.Keep automatingRelated reading: How to use OpenAI's GPT-3 to write business emails AI for business: What is AI and how will it impact work? How to write an effective GPT-3 prompt How to analyze and score leads with GPT-3 |
【本文地址】